PixelForge Documentation
Welcome to the official documentation for PixelForge — a unified real-time pixelation, lighting, and shadow rendering system for Unity.
What is PixelForge?
PixelForge is a custom Shader solution that forces your textures, real-time lights, and shadows to render in a unified pixelated grid. This ensures that light bands and shadow edges align perfectly with your pixel art style.
• Unity Version: 2022.3 LTS or higher.
• Render Pipeline: Universal Render Pipeline (URP) - 3D Renderer only. It will not work correctly with the Built-in Pipeline, HDRP, or the URP 2D Renderer.
Installation
- Ensure your Unity project is using URP (Universal Render Pipeline).
- Import the `.unitypackage` file into your project.
- The asset will be placed in
Assets/PixelForge/by default. - No special URP Asset settings are strictly required for the base shader. It works out of the box!
Workflows & Setup
PixelForge provides multiple ways to set up your materials, depending on your workflow. We highly recommend the GameObject Mass Conversion for the fastest results.
Method 1: Mass Conversion (The Fastest Way)
You can instantly convert entire objects (and their children) to the PixelForge shader.
- Select a GameObject in your scene hierarchy.
- Right-click and go to GameObject > PixelForge > Convert Materials (This Object Only) or (Include Children).
- Select a preset.
This method automatically converts the materials, preserves your base colors and textures, and automatically fixes all texture settings (disables MipMaps, applies Point filtering, and sets Normal Map types).
Note: Mass conversion replaces the shaders directly. It is highly recommended to backup your materials or scene before doing this, as reverting manually can be tedious.
Method 2: Apply to Existing Materials
- Select one or more materials in your Project window.
- Right-click and select Assets > PixelForge > Apply Preset...
- This will also automatically fix any assigned textures.
Method 3: Create from Scratch
- Right-click in your Project window.
- Select Assets > Create > PixelForge Material (From Preset).
- A new material will be generated with all properties pre-configured.
Texture Management
For true pixel art rendering, Unity's default texture settings (Bilinear filtering and MipMaps) will make your game look blurry. PixelForge provides built-in tools to manage this.
Smart Inspector Warnings
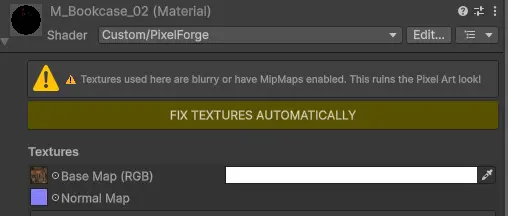
If you assign a new texture manually and it has incorrect settings, the PixelForge Material Inspector will display a yellow warning with a "FIX TEXTURES AUTOMATICALLY" button. Clicking this fixes both Base Maps and Normal Maps instantly.
Manual Texture Setup (Context Menu)
You can also fix textures directly from the Project window without opening a material:
- Select a texture -> Right-click -> Assets > PixelForge > Setup as Base Texture.
- Select a texture -> Right-click -> Assets > PixelForge > Setup as Normal Map (This additionally marks the texture type as a Normal Map in Unity's importer).
Important: Scale & UVs
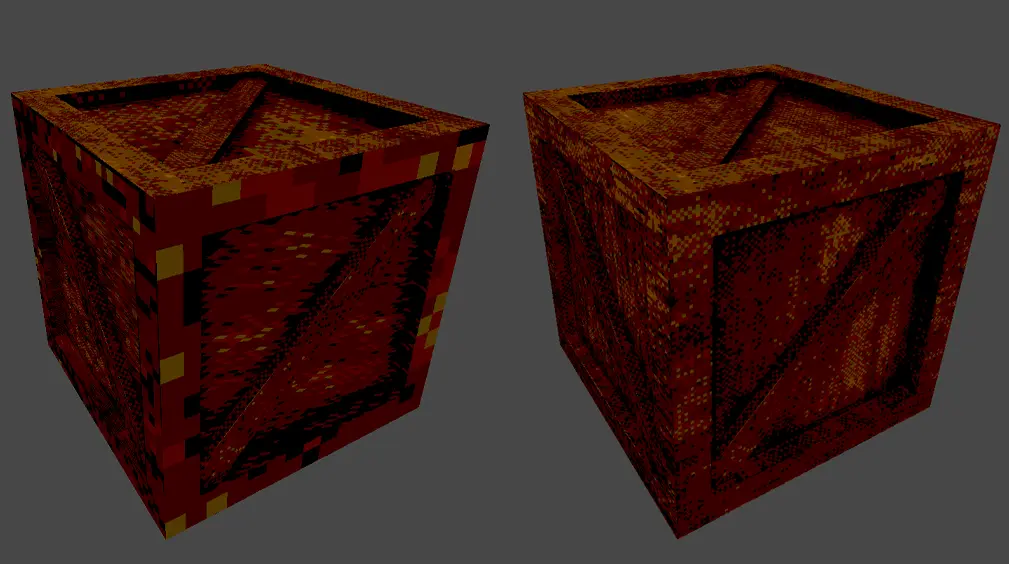
If you apply the material and notice that your pixels look rectangular (stretched) instead of perfectly square, or if different objects have different pixel sizes, this is caused by your model's Transform Scale or UV unwrapping.
- In Unity: Ensure your object's Transform Scale is uniform (e.g., X:1, Y:1, Z:1). If you scaled a cube to X:2, Y:1, the pixels will stretch horizontally.
- In Blender/Maya: Ensure your UV map is properly unwrapped without stretching. Apply scale (Ctrl+A) before unwrapping.
Parameters Guide
The PixelForge inspector exposes every detail of the rendering process. Here is the complete list of parameters:
Textures
- Base Map (RGB): The main albedo/color texture.
- Base Color Tint: Multiplies a color over the Base Map.
- Normal Map: Adds surface detail reacting to real-time lights.
Main Stylization
- Use Global Resolution: If enabled, changing the resolution will seamlessly update the pixel size for all PixelForge materials in your entire project.
- Global Resolution: The master slider for project-wide pixel size.
- Pixelation Resolution: Local pixel size (only visible if Global Resolution is disabled).
Lighting & Shadows
- Color Depth Steps: Simulates retro banding (quantization). Lower values (e.g., 16 or 32) mean fewer colors. Tip: Dithering is much more visible and effective when Color Depth is low!
- Cel Shade Steps: Controls how many distinct bands of light are cast onto the model.
- Brightness: Overall brightness multiplier for the material lighting.
- Shadow Opacity: Strength of the shadows cast onto this material (0 = invisible shadows, 1 = solid shadows).
Retro Effects
- Enable Dithering: Applies a classic retro checkerboard pattern to smooth out color banding.
- Dither Strength: Intensity of the dither pattern.
- Enable Vertex Jitter: Simulates the famous PS1 wobbly geometry.
- Stable Jitter (Fix Distance):
ON: Jitter is tied to the object. The wobble remains stable even when far away.
OFF: Authentic PS1 behavior. Jitter is tied to screen space and gets extremely chaotic in the distance. - Jitter Resolution: Controls how chunky the wobble is. (Default recommendation: 200 without stable jitter, 80 with stable jitter).
Advanced Settings
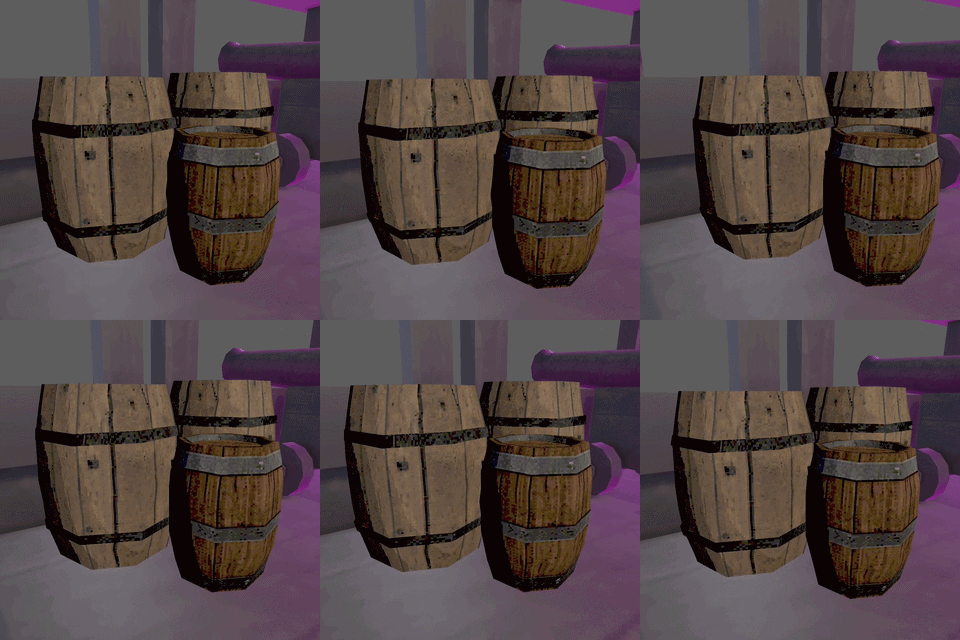
The Cleanup Radius uses a Kuwahara filter to group similar colors and reduce noise. Setting this to 2 or 3 looks beautifully painterly, but it is a computationally heavy algorithm. Use it wisely on low-end mobile devices! Setting it to 0 turns the filter off entirely, making performance identical to standard URP shaders.
- Base Sharpness: Enhances the hard edges of the pixel grid on the Base Map.
- Base Cleanup Radius: Groups similar colors together to reduce noise on the Base Map.
- Normal Sharpness: Enhances detail clarity on normal maps.
- Normal Cleanup Radius: Smooths and groups details in the normal map (does not directly affect lighting, only the texture representation).
- Shadow Fix Offset: If you see "shadow acne" (weird black stripes/artifacts on the shadow edges), tweak this slider to push the shadow slightly backwards.
Color Grading
- Min Brightness: Ambient light clamp to prevent models from becoming pitch black in unlit areas.
- Contrast: Adjust the local material contrast.
- Saturation: Adjust the local material saturation.
Preset System
The Preset Management window allows you to load built-in styles or create your own.
- 📂 Load Preset: Opens the preset selection window.
- 💾 Save as New Preset: Saves your current parameters as a new `.mat` file in the `Assets/PixelForge/Presets` folder. (Note: The script automatically detaches your Base and Normal maps before saving, so your textures don't get permanently baked into the preset).
- 🗑️ Deleting a Preset: Simply navigate to the `Presets` folder in the Unity Project window and delete the `.mat` file.
Note: All default presets use "Global Resolution". After applying a preset, you must adjust the Global Resolution slider to fit your game's visual scale.
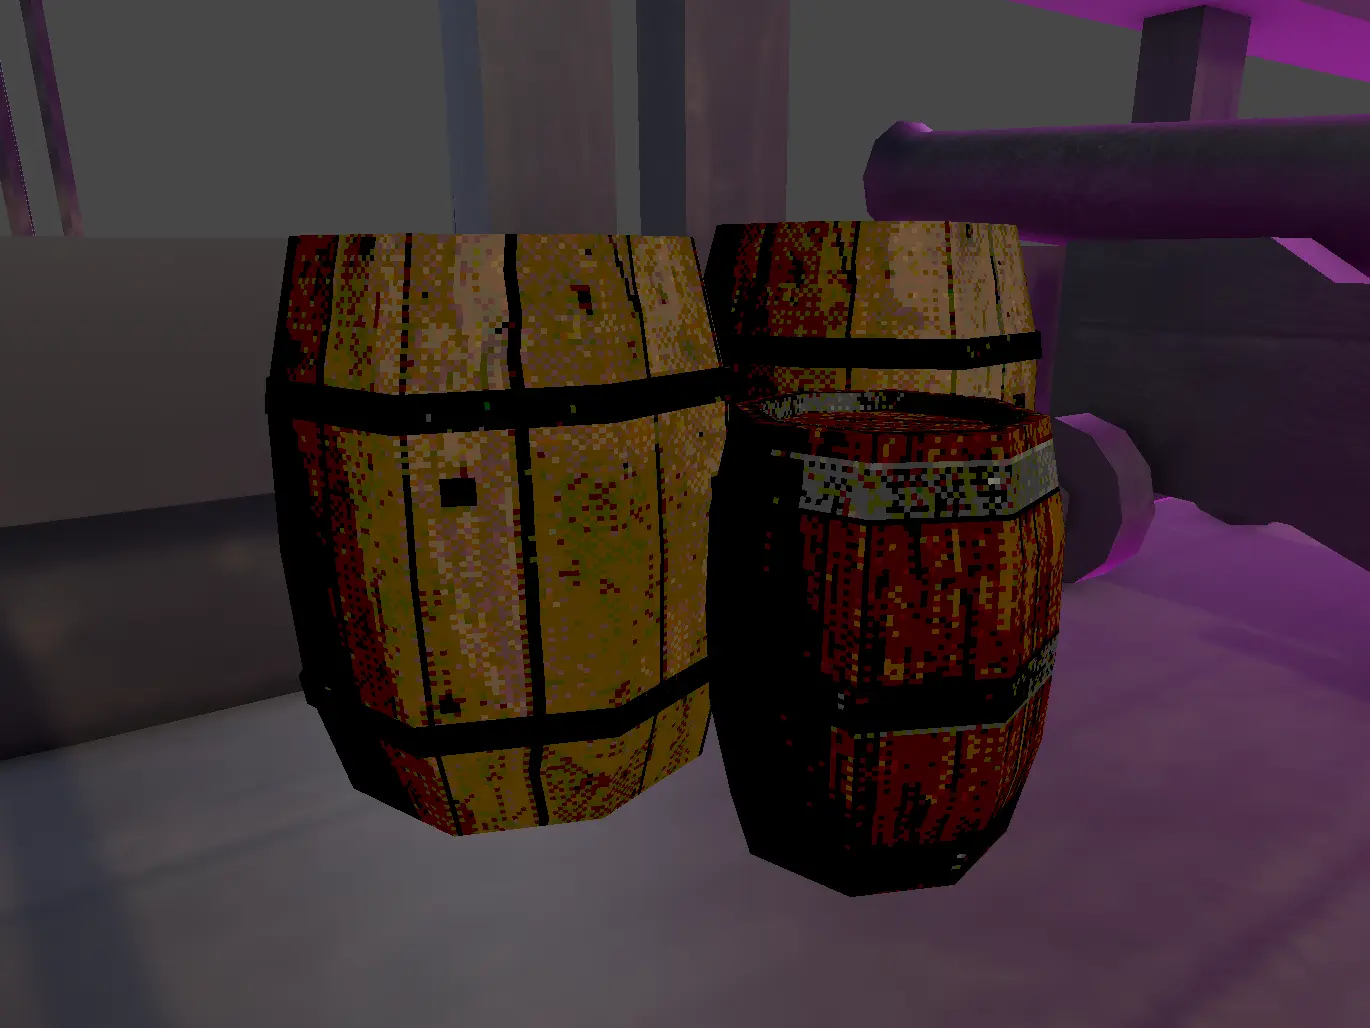
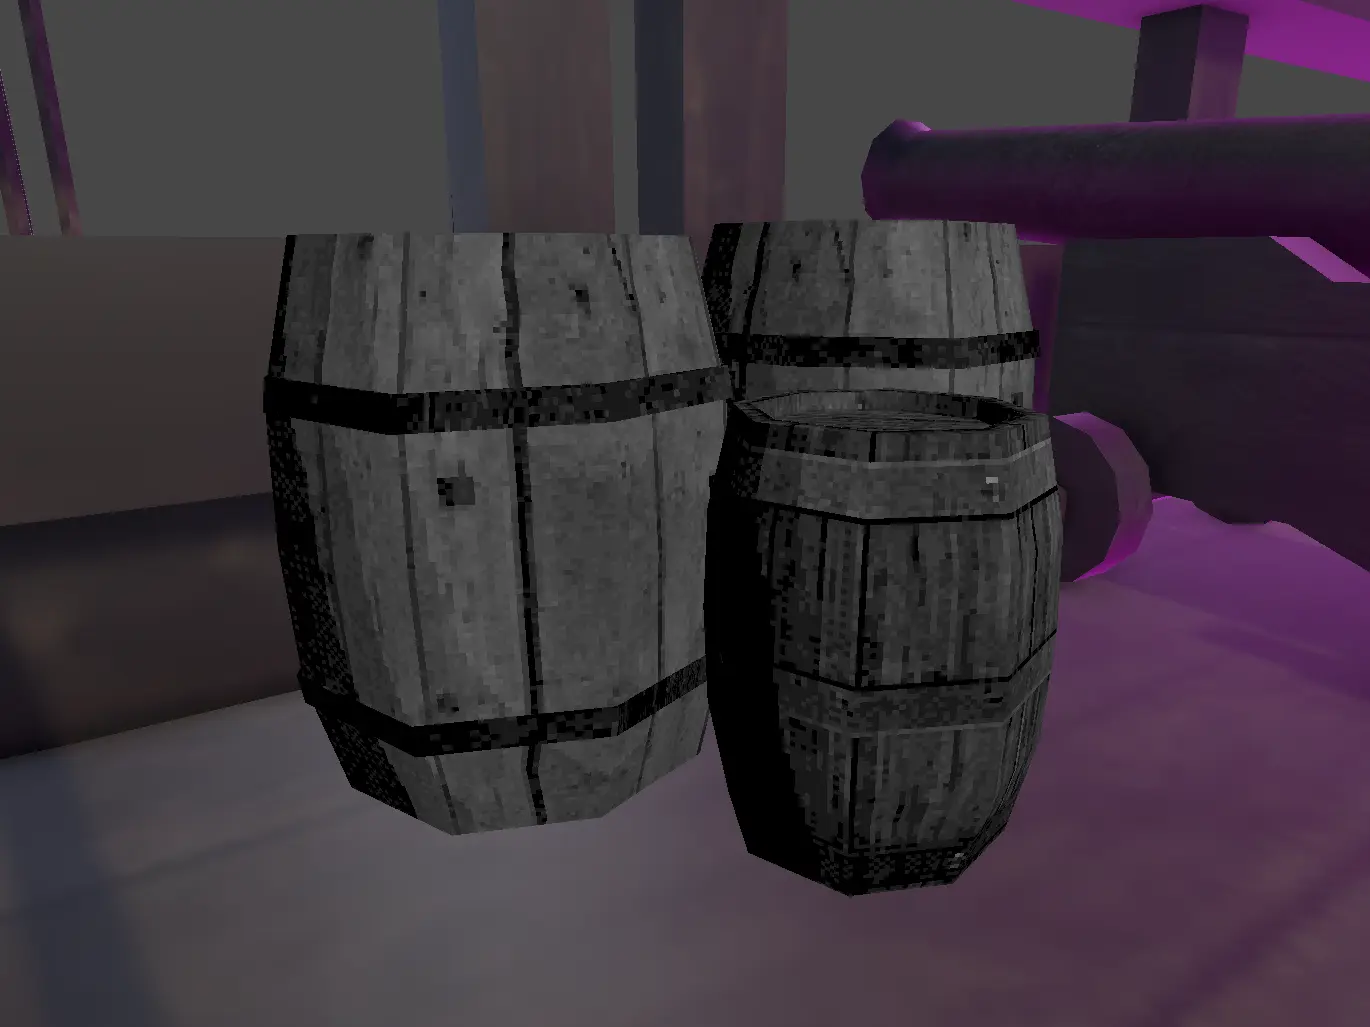
16-Bit Horror
Limited color depth, dithering enabled, jitter disabled. Dark and atmospheric, everything fades to pitch black in shadows.
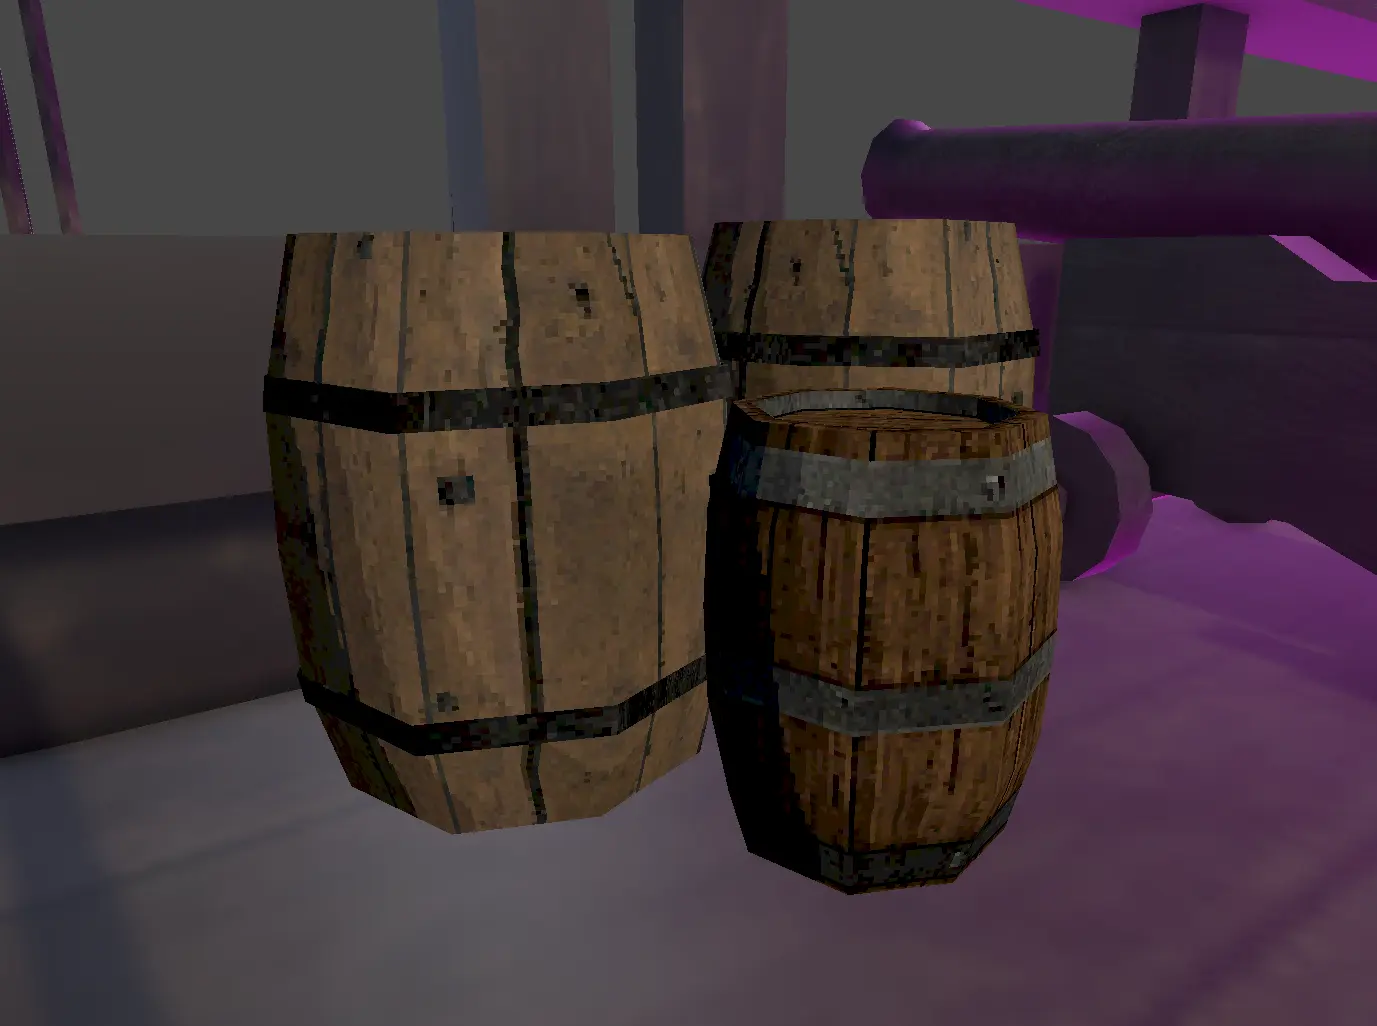
Monochrome Retro
A stylish 1-Bit classic look. Strictly black and white with dithering enabled.
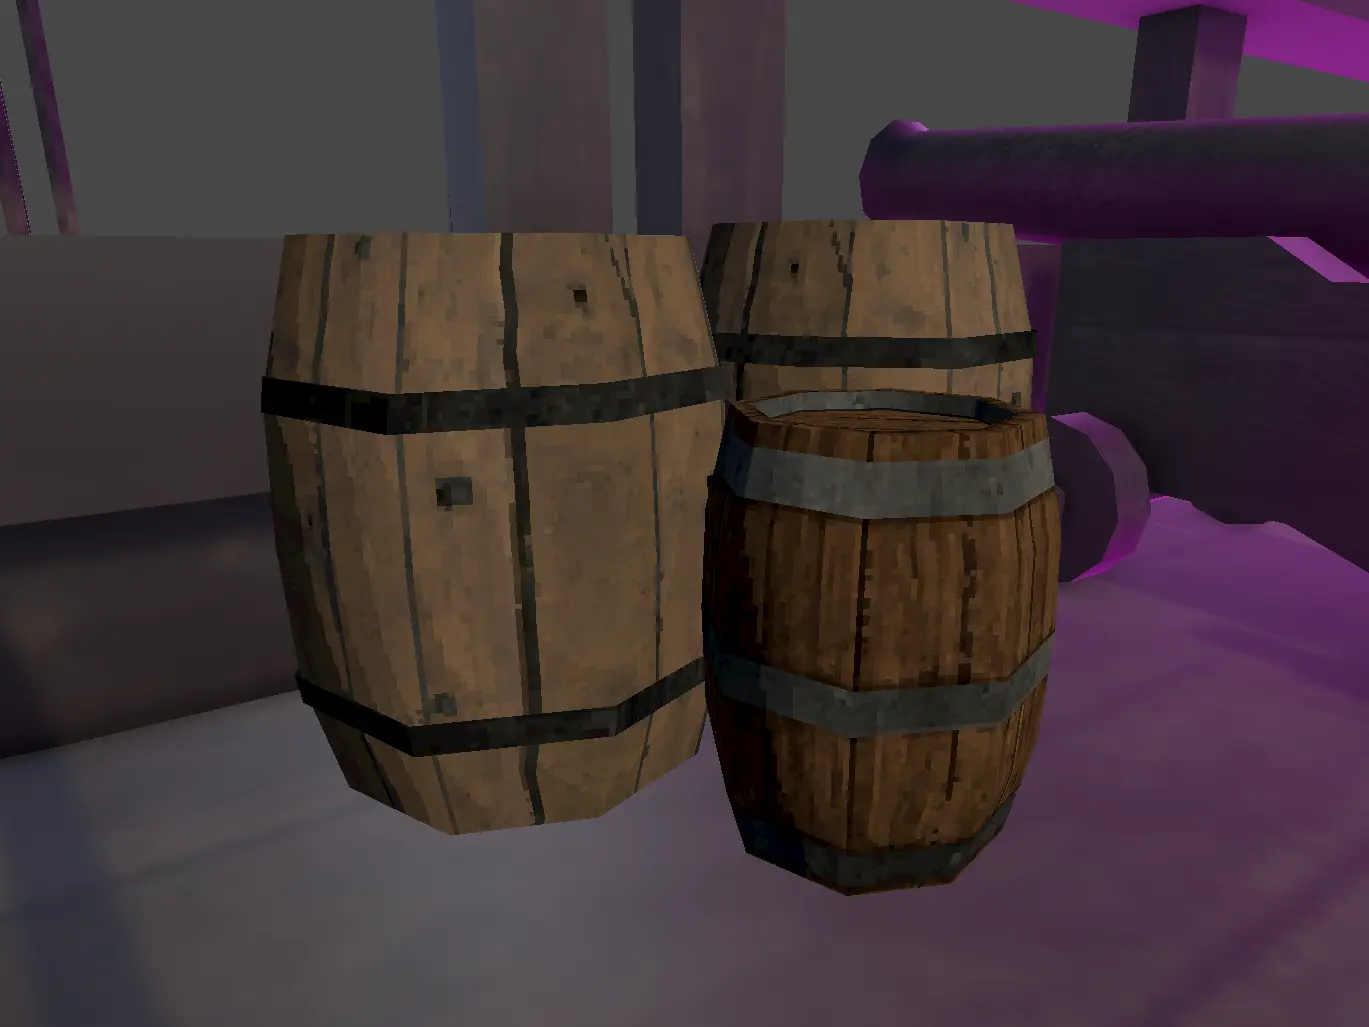
Clean Indie Pixel
Smooth, noise-free pixels. Cleanup Radius is set to 2, dithering and jitter are disabled for a modern pixel look.
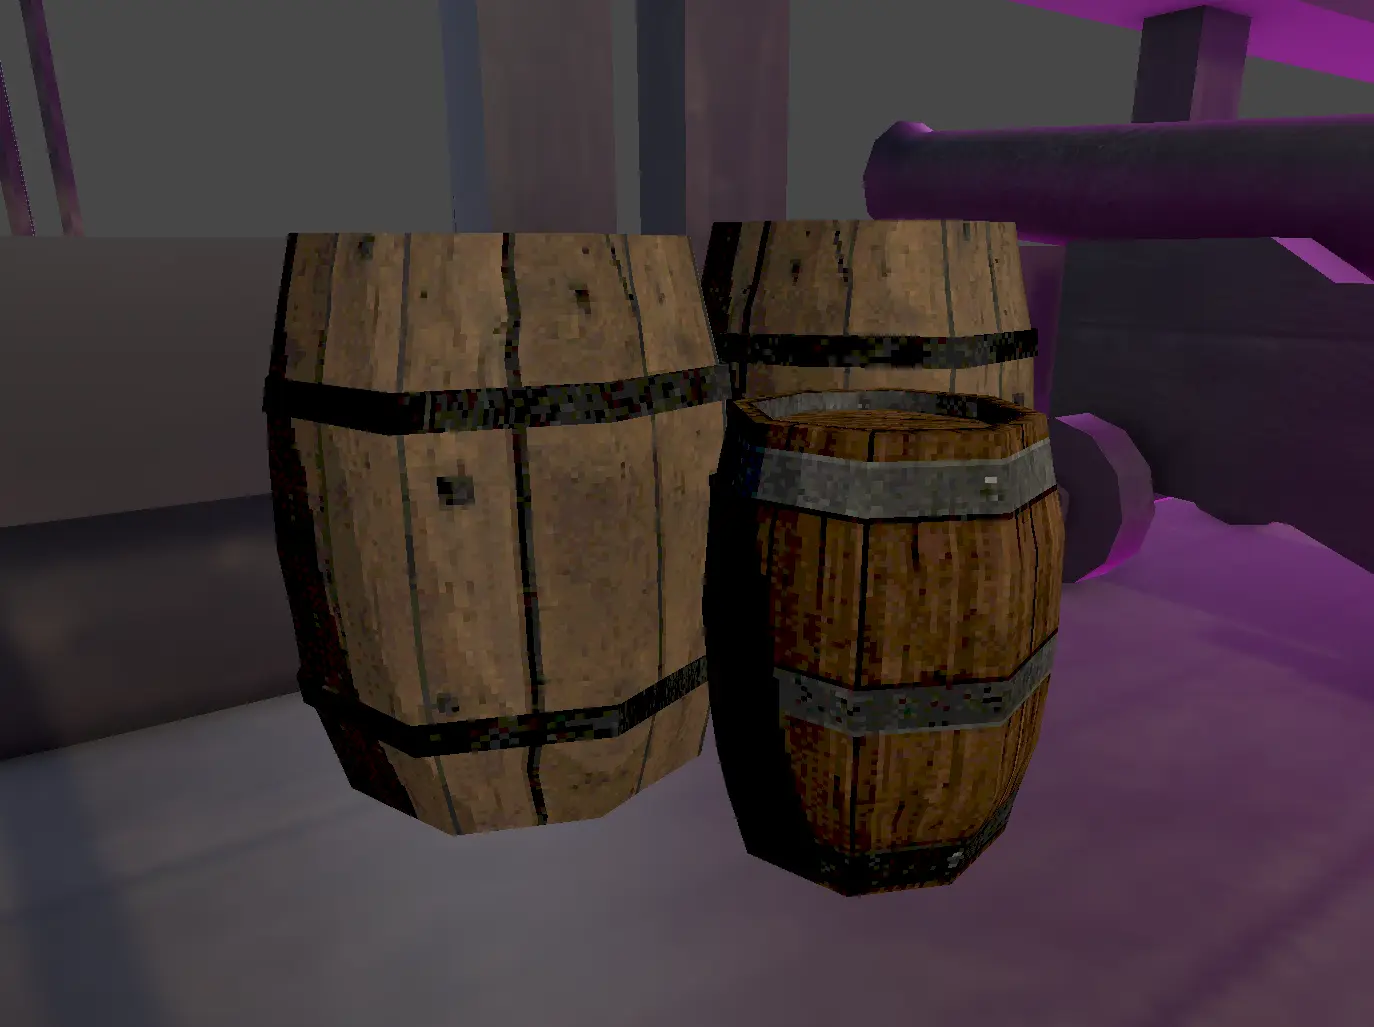
Painterly Cel-Shaded
Maximized Cleanup Radius (3) for a very smooth, grouped color style. (Heavier on performance).
PS1 Classic
The authentic 90s look. Dithering enabled, chaotic vertex jitter (no distance fix).
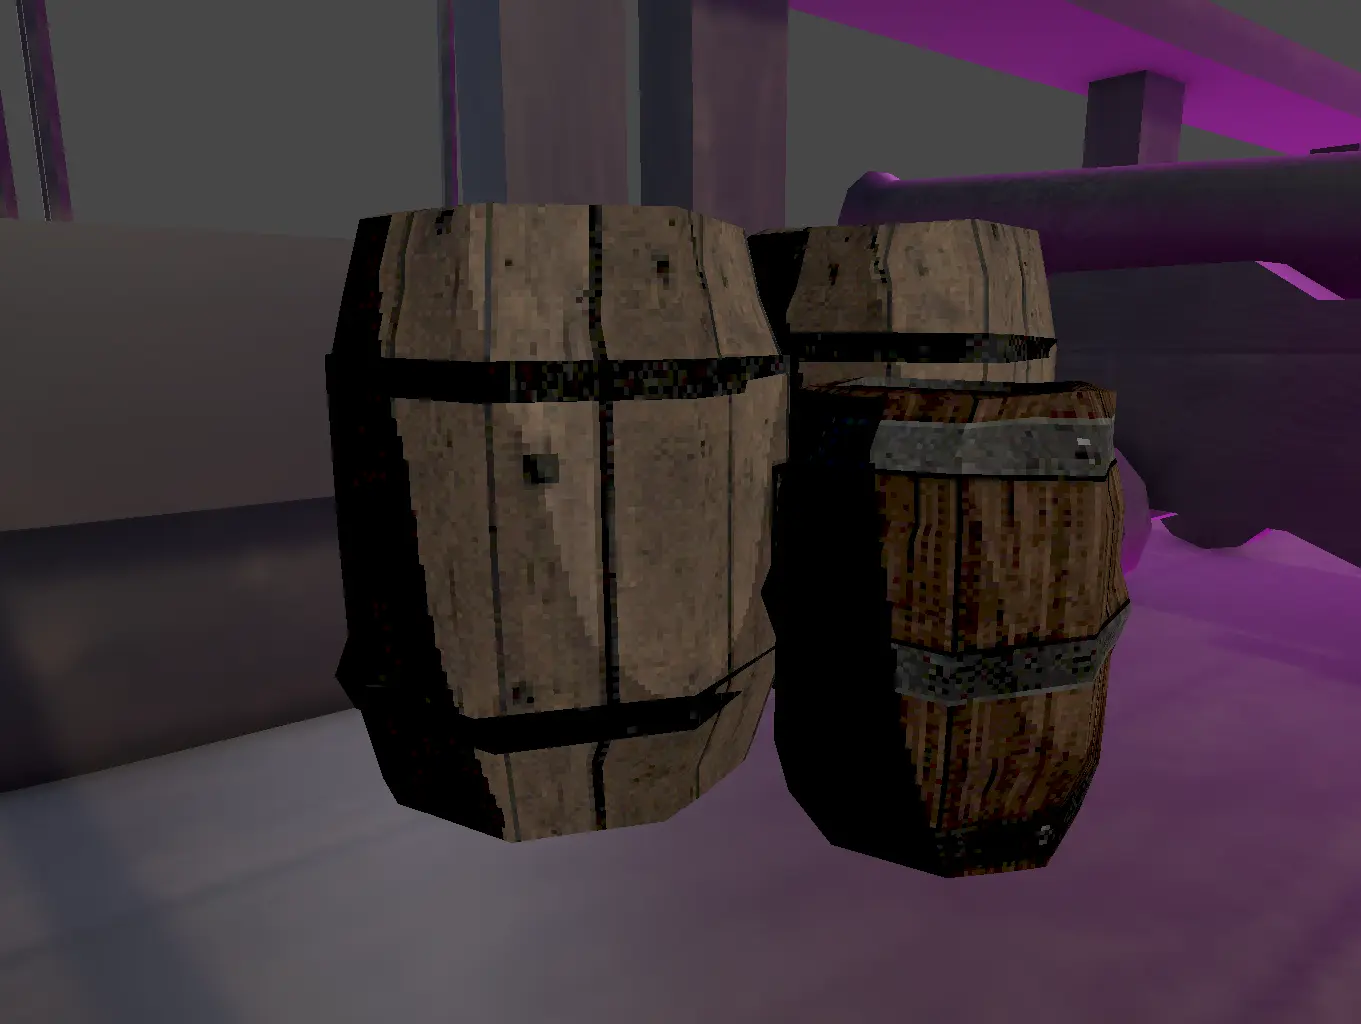
VHS Retro Horror
Balanced lighting with slightly pale colors. Dithering enabled, heavy vertex jitter (with stable distance fix).
Troubleshooting & FAQ
Q: Why are my pixels rectangular / stretched?
A: Your object has non-uniform scale (e.g., X is larger than Y) or your UV map is stretched. Apply uniform scale in Unity or fix the UVs in your modeling software.
Q: The material is pink!
A: You are likely using the Built-in render pipeline or URP 2D. PixelForge requires the URP 3D Renderer.
Q: There are no shadows at all?
A: Check your object's Mesh Renderer component. Ensure "Cast Shadows" is turned ON. Also, verify that your Directional Light has shadows enabled.
Q: Why did Git flag 20 materials as modified when I changed one slider?
A: This is intentional! When you change the Global Resolution, PixelForge automatically syncs this value to all other PixelForge materials in your project to keep your art style consistent. Unity registers this as a modification.
Q: I accidentally deleted the default presets!
A: Just re-import the PixelForge `.unitypackage` to restore them.
Need Help or Have Ideas?
If you encounter a bug, find something inconvenient, feel like a feature is missing, or just have a brilliant idea on how to improve PixelForge — I want to hear from you!
I actively maintain this tool, and I will do my best to process your feedback quickly and take action.
EMAIL ME: nedparadog@gmail.com